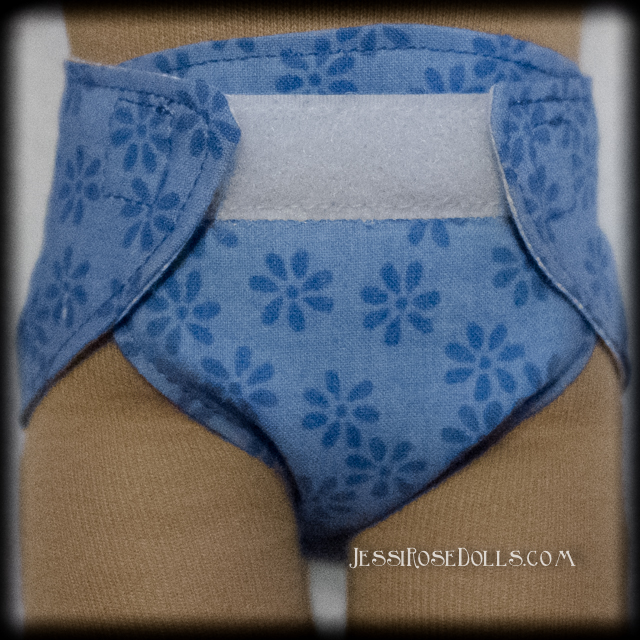
| At this time, I don't make baby dolls. But according to my daughter, any doll can be a baby: "Megan is a baby," she says one moment. Then, "Megan is a big sister." And soon thereafter, "Megan is a boy." That's great! All of these statements are true! The defining item of clothing for a baby is a diaper. With a diaper to clothe it and a blanket to wrap it, there should be no question that doll is a baby. Here I will tell you how to make a simple diaper to fit the ~12" Jessi Rose Dolls Waldorf doll. It should fit a wide variety of dolls of similar size, and is easy to modify to make larger or smaller. |
| doll_diaper.pdf |
I’ve been making a lot of patterns lately, but this is the first time I’m writing a set of instructions for others to use. This is about as simple as a pattern and a set of instructions can get. Click on the link above to download the pattern.
I am giving two options for making this diaper:
1) one layer of fleece or felt
2) two layers of fabric sewn together
I am giving two options for making this diaper:
1) one layer of fleece or felt
2) two layers of fabric sewn together
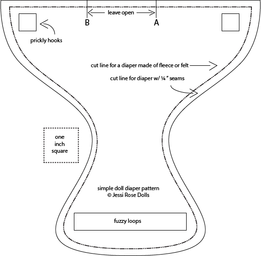
| 1) If you are making your diaper of fleece or felt, cut your fabric using the dashed line as a guide. Sew the fuzzy part and the prickly part of the hook & loop closure on the diaper as indicated. Be sure to attach the hooks and the loops on opposite sides of the fabric, or your diaper will not be functional. DONE!!! —and that’s about as easy as it gets. |
2)
If you are making your diaper of quilting fabric or another fabric that frays at the edges, cut two different fabrics using the solid line as a guide.
Pin the fabrics right sides together.
Sew from point A to point B, leaving open the 2” space indicated.
Clip the curves and the corners.
Turn right side out Use a chopstick to get the corners nice and square.
Iron. Topstitch the opening closed very close to the edge, then topstitch around the entire edge of the diaper, ¼ inch from the edge.
Sew the fuzzy part and the prickly part of the hook & loop closure on the diaper as indicated.
Be sure to attach the hooks and the loops on opposite sides of the fabric, or your diaper will not be functional.
DONE!!!
Any questions?


 RSS Feed
